¡Vivir es increible!

IMG_3849

I’ve been back from the Camino for nearly 2 months and still working through my thoughts about the experience. I can’t believe how fast the trip flew by. Once again I am back home and sucked into the routine of work and daily life…

People keep asking me how it was to walk the Camino and I find it really hard to give an answer, as there are so many things to tell, so many aspects. Though the walking was sometimes tough, even when I was tired from walking and my body ached I felt extremely free, excited and grateful to be there.

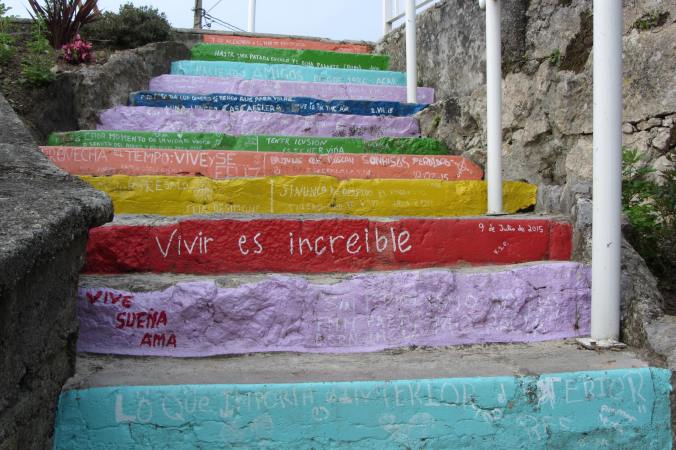
The best way I can find to explain it is: ‘Vivir es increible‘ (Being alive is incredible!). These 3 words, hand-painted on the red step in the staircase full of wise words, jumped out at me. They express so simply what I felt intensely throughout my trip.

Sometimes I feel like that amazing sensation gets drowned out in the daily rush, the noise of emails, things to do and other busy-ness.  I want to look out for it more. I’m doing my best these days to use ‘Vivir es increible’ as a mantra in day-to-day life in Amsterdam too, when I feel the routine weighing down on me or when I’m cycling to work in the rain for example.

In an attempt to process my experience, I want to share some snapshots and thoughts about walking the Camino, even if they are just a tiny piece of the whole experience. I’ll be posting them in the next days:)

Making a simple worm bin

Three years ago I went to a wormshop to learn how to compost with worms. The introductory email warned that we would be “handling worms and powertools”, 2 things that sounded like lots of fun to me:)

What you need to start your worm bin:
-2 stackable plastic boxes about 60x30cm
-cardboard and egg-cartons
-cocopeat (not mandatory)
-egg shells
-a handful of Red Wriggler worms
-a banana or a few veggie scraps

First we drilled 12 holes in one plastic box that will serve as the cover (approx. 7mm diameter).  Then we filled the other box which will serve as their home with soaked egg cartons to make the initial bottom bedding.

The next step was to put a layer of coco peat, and wet that too. Then we crushed some egg shells finely in order to make some grit, necessary for the worms to eat. These broken shells were sprinkled onto the coco peat. (I let my egg shells dry, then put them in a paper bag and crush them through the bag by hand or with a rolling pin).

IMG_2184

The next step was to put in the worms. We each got a handful of thin red compost worms, otherwise known as Red Wrigglers. They don’t like light so we quickly covered them with another layer of bedding (wet cardboard) after having put in a piece of banana peel for them to start snacking on. Then we put the other bin (the one with the holes) on top.

IMG_2192

It’s important not to put too much food for them in the beginning as it takes a little while for them to acclimatize to their new setting. Also, the food bits should be relatively small (peels are great, if you have big parts I recommend to chop them into smaller pieces).

The key for a healthy worm bin is balance, it needs to be moist, but not too wet. If it does get too wet add cardboard. If it is too dry you can sprinkle a bit of water in it. It shouldn’t smell, but if it does stir the contents to add air and put more cardboard.

After the workshop, I rode through the city with the worm bin on the back of my bike and since then they’ve been in a cupboard on my balcony. I keep them there nearly all year round, except on some extremely cold winter days when I brought them in the flat to make sure they didn’t freeze.

IMG_2195

The worms have been doing a wonderful job for the last 3 years processing my vegetable craps and cardboard. I love the thought of how much less I throw out with my rubbish, and I have the added bonus of being able to use the resulting compost for my plants.